A digital piano such as the Yamaha Clavinova requires regular maintenance to preserve its performance. Digital piano keys collect dust and residue, which can impair their sensitivity.
Using unsuitable products may damage the surface or sensors. It is therefore essential to choose gentle solutions designed for this type of keyboard.
In this guide, discover the steps for effective cleaning. From preparation to maintenance techniques, every detail matters when preserving your instrument’s appearance and responsiveness.
Introduction
Did you know that neglect can shorten the life of your instrument? Digital pianos, such as the Yamaha CLP-845 DR, accumulate dust and fingerprints, while their keys may also turn yellow. These problems directly affect playability.
Improper maintenance has serious consequences: reduced sensitivity, distorted sounds and high repair costs. Fortunately, solutions are available.
Technicians and musicians recommend two approaches:
- Gentle professional products for delicate surfaces.
- Homemade solutions, such as a mixture of water and white vinegar.
| Problem | Professional solution | Homemade solution |
|---|---|---|
| Sticky keys | Cleaner specifically designed for plastic | Slightly damp microfiber cloth |
| Embedded dust | Can of compressed air | Soft-bristled brush |
According to experts, regular maintenance can extend an instrument’s life by 10 to 20 years. For professional maintenance advice, consult specialist resources.
Prepare your workspace
Proper preparation ensures effective and safe cleaning. It protects sensitive electronic components and makes the process easier.
Switch off and unplug the instrument
Always disconnect the power before handling the instrument. This step prevents short circuits and preserves the life of its internal circuitry.
Gather the necessary tools
You will need the following items:
- An antistatic microfiber cloth for the surfaces.
- A can of compressed air for the gaps.
- A soft-bristled brush for hard-to-reach areas.
Avoid powerful vacuum cleaners. They may damage the sensors. Careful cleaning after each use limits dust buildup.
Choose the right cleaning products
Your choice of products determines how effective and safe the cleaning will be. A poor choice can damage the surface of the keys or the sensors.
Recommended products for plastic surfaces
Choose gentle, purpose-specific solutions:
- Diluted Marseille soap: ideal for removing residue without damaging surfaces.
- A microfiber soft cloth: essential for wiping without scratches.
- Specialized kits (e.g. Roland RP501): formulated for digital keyboards.
“A safe homemade mixture consists of 1 part white vinegar to 3 parts distilled water. Use sparingly.”
Products you must avoid
Some cleaners cause irreversible damage:
- Alcohol or bleach: causes yellowing.
- Silicone-based polish: makes the keys slippery.
- Abrasive products: scratch the surface.
| Product type | Effects | Alternative |
|---|---|---|
| Glass cleaner | Discoloration | Antistatic wipes |
| Lemon juice | Corrosive acidity | pH-neutral solution |
Tip: use antistatic wipes after each session for quick maintenance.
Clean the surface of the keys
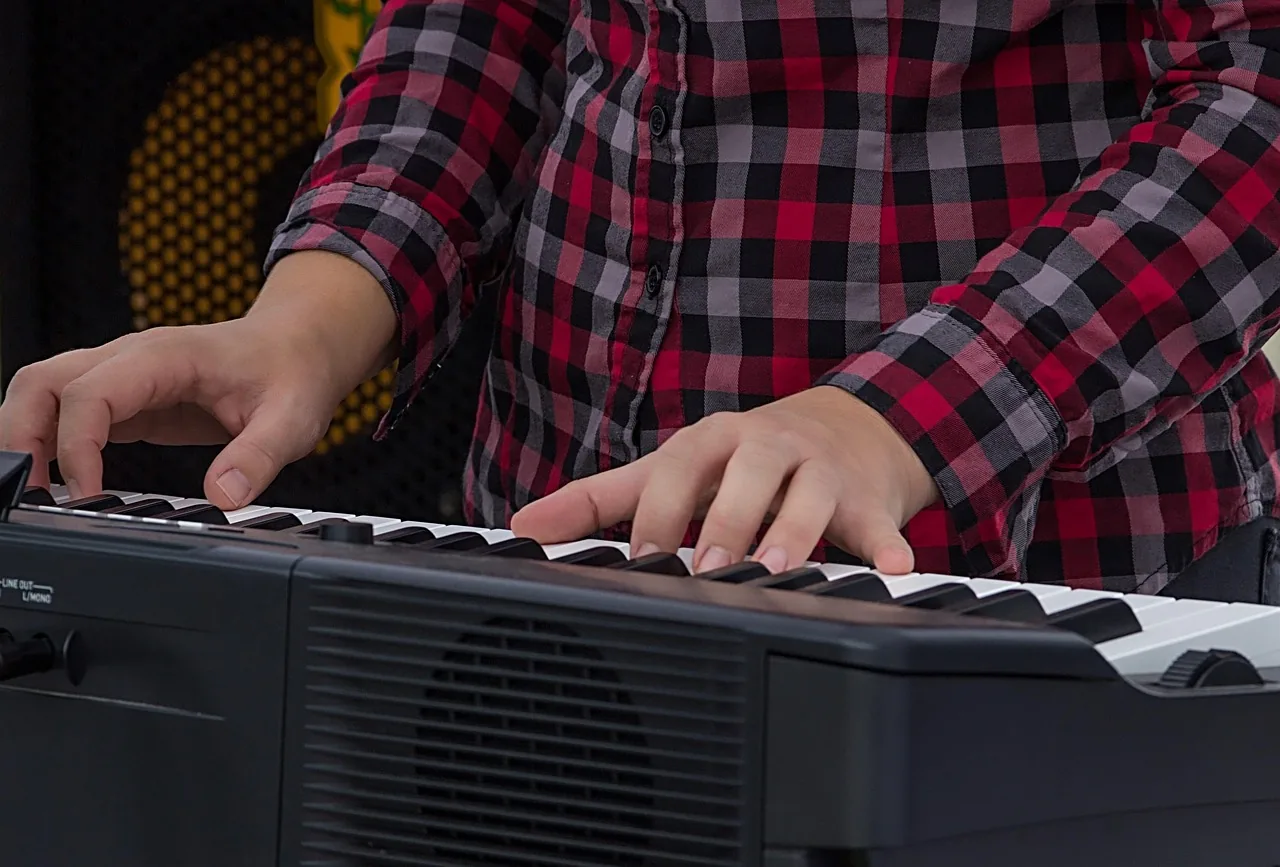
Accumulated dust impairs key responsiveness over time. Regular dusting preserves your keyboard’s sensitivity and appearance. Here are two proven methods.
Use a dry microfiber cloth
Choose a lint-free microfiber cloth. Gently move it from left to right without applying pressure to capture particles. For models with synthetic ivory keys, a slightly damp cloth prevents static electricity.
Remove dust with compressed air
A can of compressed air is ideal for the gaps. Hold it 15 cm away and direct the jet vertically to avoid scattering debris. Avoid sudden movements near the sensors.
| Tool | Use | Precautions |
|---|---|---|
| Microfiber cloth | Daily dusting | Do not rub |
| Compressed air | Monthly cleaning | Keep a distance of 15 cm |
Weekly regular maintenance is recommended for instruments that are used intensively. Avoid paper towels, which are too abrasive for matte surfaces.
Clean sticky keys
Sticky keys can quickly interfere with smooth playing. An effective solution can be prepared using simple ingredients without risking damage to the sensors.

Prepare a homemade solution
Mix 1 part white vinegar with 3 parts demineralized water. This ratio prevents corrosive acidity while dissolving residue. Use a cloth made of microfiber, wring it out before applying the mixture, then dry the keys immediately.
Always test the solution on an inconspicuous key, such as a high note, before treating the entire keyboard. This precaution lets you check its compatibility with the material.
Apply gently with a damp cloth
An owner of a premium model such as the Clavinova GP PWH reports:
“This method restored the smooth feel in 10 minutes, without leaving marks or residue.”
Roland active-foam kits are another option and provide a non-abrasive formula. Allow 5 to 10 minutes of drying time to prevent residual moisture. To reach difficult areas, consult this guide to disassembling a digital piano.
Reach the gaps between the keys
The spaces between the keys require special attention during cleaning. Dust and residue collect in these narrow areas and can interfere with smooth playing.

Use a soft-bristled brush
Choose an antistatic brush with natural silk bristles. This material prevents scratches on the sensitive surfaces of the keyboard.
Use a Z-shaped motion to dislodge trapped particles. This method protects the sensors while removing stubborn dirt.
Clean with cotton swabs
For models with heavy actions (e.g. Yamaha CLP-865 GP), cotton swabs moistened with distilled water are ideal. They reach into corners without risk.
“Careful wiping after every use reduces the time required for deep cleaning.”
Avoid metal toothpicks: they scratch the plastic of the keys. Choose gentle tools for damage-free maintenance.
Deep-clean the keys
For optimal maintenance, you may occasionally need to go beyond simple dusting. Embedded residue or moisture can require careful attention.
Remove the covers if necessary
On recent Clavinova models, a hex screwdriver is required to remove the covers. Consult the Yamaha manual for a visual guide and proceed safely.
Warning: exposing the internal circuitry increases the risk of oxidation. Use a multimeter to check the contacts after reassembly.
Use specialized cleaning kits
Professional kits such as the Roland RP501 provide a formula suitable for optical sensors. Compared with homemade solutions:
- Professional kits: ready to use and safe for the electronics.
- Homemade mixtures: economical, but require greater care.
“A dry microfiber cloth is sufficient for the sensors. Avoid any liquid near sensitive components.”
If moisture causes damage, consult an authorized technician. Some premium models require specialist expertise.
Dry and reassemble the keys
After cleaning, one crucial step ensures the longevity of your instrument. Improper drying can damage the electronic components or impair key sensitivity.
Wipe carefully after cleaning
Use a dry microfiber cloth to remove every trace of moisture. Make sure you pass it gently through the gaps.
Recommended methods:
- Air-dry with indirect ventilation (2 hours).
- Avoid direct heat sources (radiators, hair dryers).
Check that the keys work
Test each key with MIDI software such as Ableton Live. This helps detect problems:
- Delayed response.
- Unwanted noise.
- Uneven height (on recent Clavinova models).
“A ThermoPro TP50 hygrometer helps maintain an ideal humidity level (40 to 60%). Protect the sensitive components.”
Tips for regular maintenance
Keeping your instrument in perfect condition requires a simple but effective routine. Good habits prevent dirt buildup and preserve sound quality.
Weekly cleaning
Spend 5 minutes each week on quick dusting. Use a dry microfiber cloth to remove visible particles. Follow up with an antistatic wipe for stubborn marks.
Recommended frequency:
- Occasional use: thorough monthly cleaning.
- Intensive practice: complete weekly maintenance.
Protect the piano with a cover
A suitable dust cover is essential. For 88-key models, choose a cover made of breathable micro-mesh. This material allows optimal air circulation.
“Thick covers cause condensation. Choose purpose-made covers available on specialist platforms.”
Avoid at all costs:
- Non-breathable materials such as plastic.
- Household blankets that trap moisture.
Careful maintenance after every use extends the life of your keyboard. Adopt these habits to keep your instrument performing at its best.
Common mistakes to avoid
Some habits can irreversibly damage your instrument. Knowing the mistakes to avoid is crucial to preserving your keyboard’s quality and longevity.
Unsuitable household products
Many common household products are too harsh for delicate surfaces. These must be avoided:
- Solvents and ammonia: corrode plastics.
- Silicone-based polish: makes the keys slippery.
- Bleach: causes accelerated yellowing.
“One user irreversibly damaged their keyboard with an alcohol-based glass cleaner. The keys became rough within three months.”
Effects of humidity
Poorly controlled humidity seriously affects electronic components. Typical consequences include:
- Oxidation of MIDI/USB contacts.
- Misadjusted pressure sensors.
- Discoloration of synthetic-ivory keys.
A study of a Clavinova stored in a damp garage found:
| Problem | Cause | Solution |
|---|---|---|
| Repeated failures | 70% humidity | Dehumidifier with an alarm |
| Stuck keys | Internal condensation | Maintain humidity at 45 to 55% |
Also beware of overly concentrated “homemade” remedies. Citrus fruits and undiluted vinegar attack finishes. Always choose gentle, tested solutions.
Conclusion
Taking care of your instrument ensures years of optimal performance. Use suitable products and follow the safety steps to prevent damage.
Regular maintenance preserves resale value and sound quality. Models such as the Yamaha CLP-845 DR require special attention.
Adopt a simple routine: weekly dusting and key checks. To learn more, consult our complete guide to electric pianos.
Tip: schedule monthly reminders to keep your keyboard spotless.



0 Comments